How to scan artwork
Introduction to scanning artwork
Apart from photographing artwork, scanning is another method for converting your art into digital images. You can pay a scanning bureau to scan your work with a drum scanner, but you can often achieve good quality results with a flatbed scanner at home.
Professional drum scanning
Generally, drum scanners are of an impressive size and correspondingly expensive, costing around as much as a car or a small house. These are used by pro labs to scan your film, so it is hardly surprising that a high-resolution scan can cost £25 to £50 a time. The drums used are typically a metre or so long, and a number of images are scanned at the same time, each negative being held on a small part of the drum’s surface.
The light source is in the middle of the drum and the photocell outside. As the drum rotates, it scans every point on a circle around it. The light and photocell then move a fraction parallel to the axis of the drum for the next line to be scanned. The curved drum keeps the film to light source distance constant, and avoids problems with reflections.
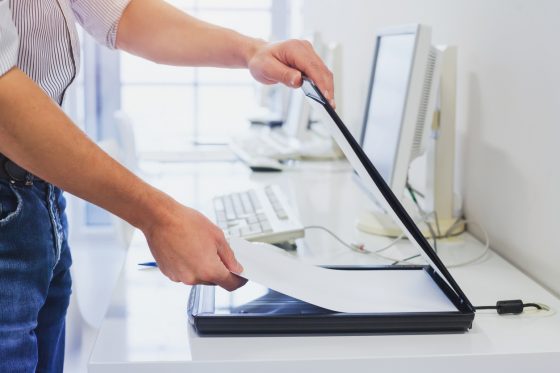
How to scan artwork with a flatbed scanner
Before you start
- You need a flatbed scanner installed and connected to a computer system.
- Before use, carefully clean the scanner glass with a damp cloth or glass cleaner and dry.
Prepare the image and software
- Put the print face down on the glass. Ensure that the actual print area is parallel to the edges of the scanner.
- Start the scanner software. On some scanners there is a scan button, or there may be an import function on your images processing software, or a separate scanner program.
- If your scanner software does not automatically run a preview, do so (unless you are using VueScan — see Tips below.)
- If your picture is skewed, adjust the alignment and repeat the preview.
- On the preview, use the mouse to outline the desired scan area.
Choose colour and resolution
- If you are going to use Photoshop (or other image manipulation), scan all images as ‘millions of colours’. Otherwise use this for colour and grayscale for black and white.
- Adjust the scanner resolution to give an appropriate file size in pixels. For printing, scan to get 300 pixels per inch of final print size. For web, create a scan with largest side around 900 pixels.
- Try the auto-exposure button if there is one in the software, then adjust brightness and contrast if needed. On some scanners, resetting to default will give good results.
- For colour pictures, set any colour controls to the default values unless you are scanning direct to a printer.
- If your scanner has a setting that allows you to improve shadow separation, use it.
Finally, scan and save your artwork
- Scan the images, saving in TIFF, BMP or PCX, but not as JPEG.
Tips
- Always set the size measurement on the software to read in pixels when making a scan, unless you are scanning directly to a printer.
- Third-party scanning software may produce better results than that supplied by the scanner manufacturer.
- Never scan at a higher resolution than the actual optical resolution of your scanner. Never use any ‘sharpen’ command in the scanner software.
Scanning work larger than your scanner
- Take the cover off the scanner
- Place artwork face down on scanner.
- Scan the first quarter at a resolution of at least 300 dpi, preferably higher, taking great care to align the artwork squarely.
- Continue to scan all four quarters with exactly the same settings and again, take great care to align the artwork squarely.
- Open each of the quarters of the painting in Photoshop.
- To remove any canvas pattern, etc. optionally:
- Apply Filter -> Blur -> Gaussian blur, have the radius at between 5–10 pixels
- If you scanned at more than 300 dpi, reduce each quarter to 25%
- Go to Image
- Go to Image Size – the window will look like this (Note: Make sure that Constrain – Proportions box is checked: Image Window
- Change inches to percentage by pressing the triangle next to the word inches.
- Change width to read 25% (when the Proportions box is checked, both the width and height will be reduced by 25%).
- Press OK.
- Make each of the quarters 25%.
- If necessary, go to Image -> Rotate, and select the correct number of degrees so that it will be right side up.
- Now it is time to put your painting together.
- Go to Image -> Canvas Size, change the width to 5 inches and the height to 6 inches. This will give you enough room to assemble the painting.
- Next, add 3 more layers to the image, one for each of the quarters.
- Make sure the Layers Palette is open.
- If it isn’t, go to Window -> Palettes -> Show Layers to open it.
- Press the triangle until the menu pops out and choose New Layer.
- Using the Marquee tool, move the bottom left side of the painting to the bottom left side of the screen.
- Copy each of the remaining quarters and paste it into its own layer in your assembled image file.
- You can now move around each of the quarters until they all match up with each other by selecting the layer that it is on and using the Move Tool (tip: you can use the arrow keys) to move each section by a very small amount).
- When you are happy that all the quarters line up, go back to the Layers Palette and press the triangle again. This time choose “Flatten Image” and your quarters will now be pasted together.
- At this point, you can handle this image like any others you have edited, however you might need to trim it a little, sharpen it, adjust the colors, change the size to fit your web page, etc.
Which scanner to buy
Scanner technology is improving all the time, so it’s difficult to keep current with recommendations. Apart from following recommendations, the main factors to consider are the optical resolution and bit depth, but any new scanner is likely to be able to produce acceptable results.
Some consumer review magazines/websites:
References
External Links
Related reading
How to digitise your artwork: photography and scanning
This post was originally published in April 2011. Last update: November 6, 2020.


16 comments for “How to scan artwork”